


For some reason, silos weren’t popular in the part of western Pennsylvania where I grew up. Even though my uncle on the next farm milked 20 or so head of cattle, they never tasted ensilage and Dad’s chickens didn’t either. For that reason I never experienced the joys of silo filling, which was an event nearly as important on many dairy farms as threshing.
Like threshing, silo filling took a large amount of labor during a short period of time, as well as many teams and wagons. In the time-honored practice called “neighboring,” farmers in a neighborhood would come together at one farm after the other to pool their labor and resources in order to get everyone’s silo filled. Threshing contractors often owned an ensilage cutter and, after threshing season wound down, they would use their steam engines to travel around and fill silos.
Setting the stage for fermentation
According to Hoard’s Dairyman, in order to make good silage, the corn should be cut when “just past the roasting ear stage,” and the stalks were still green and juicy. A 1922 Kansas State University circular recommended that “the proper time to cut corn for the silo is about a week or 10 days before it is ready to put up in the shock; the (kernels on the) ear should be well dented and the lower leaves on the stalk dry, but the stalk itself still full of sap.”
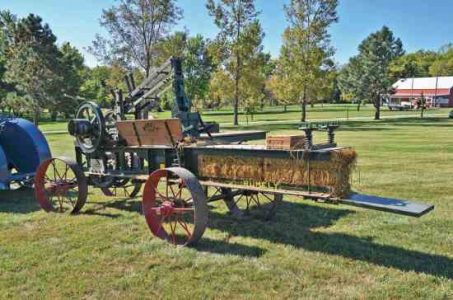
The still partly green stalks, ears and all, were cut in the field and hauled to the silo, where they were fed into an ensilage cutter and blower powered by a belt from a tractor. This machine cut the crop into small pieces and blew the pieces up a pipe and into the top of the silo. One or two “fortunate” individuals inside the silo directed the movable pipe spout to distribute the crop and also made sure the silage was tramped down tightly around the outside edges.
In order to prevent the green crop from spoiling and encourage fermentation, thus making silage, air has to be excluded. This was usually done in an upright silo by merely wetting down the top layer with water. This causes a layer of rotten silage a few inches thick on the top, which effectively seals the silage beneath it. Some farmers used wet, chopped straw or hay for this purpose as well.
Turning lemons into lemonade
Probably the first reported use of a silo occurred on the Bavarian farm of Adolf Reihlen, who had lived in the U.S. while learning to grow maize (corn). In 1861, his corn suffered frost damage so he cut it and buried the stalks in trenches. When he dug it up later, the corn was preserved and his cows loved it.
Auguste Goffart of France published a book on silage in 1877, which was later translated and published in this country. A few progressive U.S. farmers experimented with trench silos during the late 1870s. One claimed he could winter a cow on seven tons of ensilage. He reckoned that the cost of the silage was 80 cents per ton, making the entire cost of wintering a cow $5.60 versus the usual cost of $20 to $25 while feeding hay and dry fodder.
A square deal
Of course, tradition-bound farmers were reluctant to try anything new, but the process gradually gained favor. During the 1880s, most silos were square or rectangular and were built inside a barn of stone or wood. Wisconsin farmer John Steele, who had been using a square silo for several years, is credited with building the first round silo in 1888. This structure, which lasted 27 years, was 18 feet in diameter and 30 feet high. It was built of 2- by 6-foot staves.
Arthur McGeoch built what was then called the “largest silo in the world” at his farm near Milwaukee in 1898. This monster was 64 feet in diameter, 60 feet high and held corn harvested from 200 acres. The big silo was found to be totally impractical and was used for only three years.
The University of Wisconsin ran tests during the winter of 1882-83 and determined that the amount of food from silage was 50 percent greater from dry fodder. Silage-fed cows produced 10 percent more milk and 11 percent more butter, as well, while drinking one-sixth as much water.
Form and function
Square silos remained the norm until the 1890s, even though there was a problem with the silage spoiling in the corners. Round wood-stave silos then became popular and were virtually the only kind built for a good many years due to the superior insulating qualities and the lower cost of wood over masonry.
Local carpenters usually built the early wood silos, using cypress, pine, cedar or redwood lumber. Vertical staves were held tightly together by iron or steel hoops placed at varying heights around the outside. A series of removable doors were built into the silo from top to bottom, one above the other, to allow the silage to be removed. These doors had a ladder alongside and were usually protected by a chute. Although a roof wasn’t necessary to keep the silage, most silos had one to help protect the structure from the elements, and a door was put into the roof to allow for filling the silo.
Silos were also made of stone or poured concrete, with the wooden inside and outside forms being jacked up after each level was poured and had set. In locations near brick or tile yards, silos were laid up using these materials. Eventually manufactured wood or concrete stave silos became available, and plate steel versions were developed by the 1930s.
Relic of the past
Today, most of the old wooden silos are gone – blown over, burned or deliberately demolished. Many of the concrete and tile examples are gone as well; fewer and fewer remaining silos are actually being used. Most farmers now use trench silos or plastic bags, while high-moisture round balers and wrappers, along with field choppers and self-unloading wagons, have made the laborious ritual of “silo filling” a thing of the past.
Of course, not many look back on those days with nostalgia. One account from many years ago tells of a young man who fervently hoped his “Pa” wouldn’t put him inside the silo again that year. Of course, that’s where he ended up. He wrote: “How I hated the silage raining around my head as I walked around and around, corn chaff working into every crevice of my body, and into my very soul.” Later, after a hearty noon meal and a too brief nap, he crawls back inside the silo and “Just as I grabbed the director rope for the chute, a deluge of wet sticky corn chaff rained over my head, filling my eyes and throat. Coughing, I choked up a wad of green slime and spit it out. I cursed corn.”
If a reader has a personal story about the fun (or the misery) he or she had while filling a silo, I’d be interested in hearing it. FC
Sam Moore grew up on a farm in western Pennsylvania. He now lives in Salem, Ohio, and collects antique tractors, implements and related items. Contact Sam by e-mail at letstalkrustyiron@att.net.


